Customize Your Settings
This tutorial will guide you on how to customize myPolicies to suit your company’s needs and give it its very own look and feel.
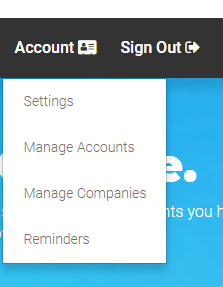
When logged in as an administrator, you can edit the myPolicies settings by clicking on "Account" on the far right of the black menu bar near the top of the page. From the sub-menu, choose Settings.

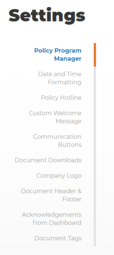
Policy Program Manager
This is the name of the person who’ll be the super administrator of the system – the one person who’ll be able to access all the documents created within myPolicies. This person can add other administrators who can also access documents, but only ones they’ve been assigned to, or own. The Policy Program Manager is the only user who can create other administrators. To do so, click on “Account” and select “manage accounts.” Then click on the employee that you wish to give administrator rights to, and select "admin."
Date and Time Formatting
Select an appropriate time zone, a 12- or 24-hour clock, and the date format that works best for your organization.
Default Acknowledgement Dates
The "Deadline" field, on the left, allows an administrator to set a default length of time from the drop-down menu. This is the time that employees will have before they need to acknowledge a policy. On the right, the "Reminder" field allows you to select when an email notification to employees will be sent out, reminding them that the policy must be signed soon.
Default Document Review Dates
An administrator designate a default review frequency from the drop-down menu for all documents within myPolicies. The administrator must also set a review month and day, on the right. Policy owners will receive an email reminder when it’s time to review the document to ensure it’s still up to date.
Policy Hotline
Enter a phone number that users will be able to see on their main dashboard when they log in. This will assist them if they ever need help with something. If you don’t have a help line, you can leave this field blank.
Custom Welcome Message
Customize the message that employees will see when they first log in to their myPolicies dashboard. The idea here is to be inviting and informative.
Communication Buttons
Employees are able to communicate with document owners to ask questions, voice concerns, request exemptions, or report incidents. This is the default setting. If you’d prefer to disable this feature, simply click on the disable button.
Document Downloads
myPolicies gives users the ability to download PDF versions of the documents you’ve assigned to them. If you do NOT want to provide that service, click the "Disable" button.
Company Logo
This next step allows you upload your logo in a PNG format and have it appear at the top-right corner and bottom-left corner of the web page. You can also remove a logo by checking the box just below.
Document Header & Footer
This section allows you to further brand all your documents in this next section by adding a "Header and Footer" that you can upload in PNG or JPEG format. You can choose to align these to the left, right, or in the center by using the drop-down menu. Your header and footer will then appear on all of your documents in the system. Please note if your documents already have a header, you do not need to add a standardized one here.
Acknowledgements from Dashboard
To streamline things, users are able to acknowledge documents from their dashboard without having to read them first.
But if you’d prefer that users read documents before they can acknowledge them, simply check the "disable dashboard acknowledgement" button. If you do this, you can then customize the next field below this, "Acknowledge Time."
To make sure users read a document before acknowledging it, you can select a mandatory waiting period from the drop-down menu, up to a maximum of 3 minutes. This is the time users have to wait before they can click the acknowledge button and this helps foster a culture of compliance.
Acknowledge All Policies
This feature gives users the ability to click one button on their dashboard to acknowledge a large number of documents when there might be too many to read and acknowledge individually. To enable this feature, simply check the box. But remember, if you choose this feature, the "Acknowledge Time" feature, above, will be disabled.
Document Tags
These tags are designed to allow users to easily filter and find documents and group policies together based on up to four different categories, such as department and location. Each category contains further options, which will act as tags to allow you to further differentiate your documents and give them different distinctions. The great thing is, there’s no limit to the amount of options you can create within each category.
Save & Close
The very last step – and a very important one – is to hit the blue "Save" button at the bottom of the page. If you DON’T, you’ll lose all your hard work.

